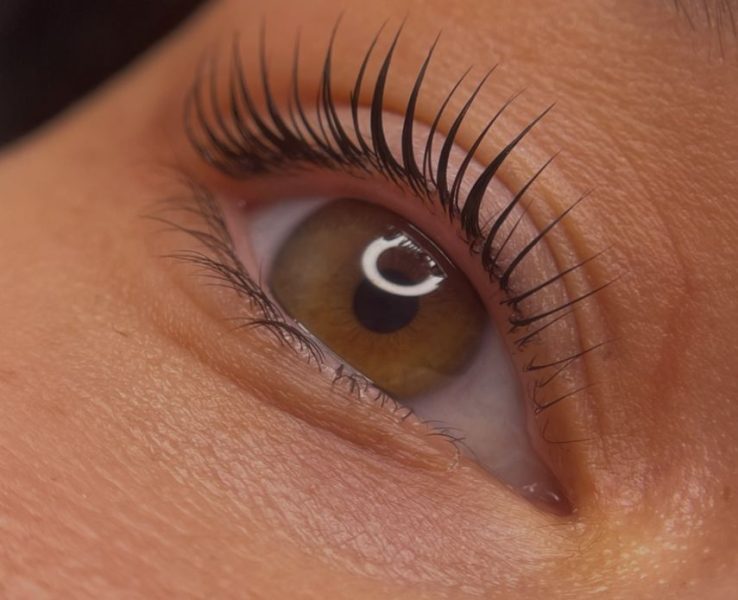
Beautiful, curled lashes are a dream for many of us. Lash lift and lamination are methods that allow you to achieve this effect without the daily use of an eyelash curler and mascara, all from the comfort of your home. I will introduce you to the at-home lash lift and lamination and present my favorite products.
Lash Lift and Lamination
Lash lamination is a method that involves applying a special conditioner to the lashes. This makes the lashes smooth, shiny, stronger, and more flexible. The lamination also helps to regenerate the lashes weakened by frequent use of mascara or false lashes.
Lash lift, on the other hand, is a method that lifts and curls natural lashes, giving the effect of an open-eyed look. It involves attaching the lashes to silicone rods and applying special products that curl them durably. The effect can last up to 8 weeks.
The Best Lash Lamination and Lift Kits
Let’s take a closer look at some popular lash lift and lamination kits available on the market.
1. Nanolash lash lift and lamination kit – Lash Lift Kit
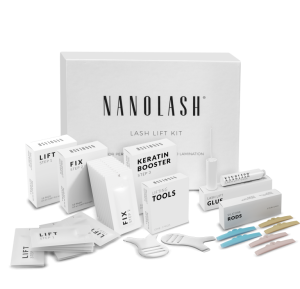
This kit contains high-quality products that not only provide an amazing visual effect but also nourish and regenerate even very weakened lashes.
Their kit includes everything you need for professional at-home lash lift and lamination, including:
- 10 sachets each of activator, neutralizer, and conditioner,
- 5 ml glue,
- 3 pairs of rods,
- 3 lash combs.
Because it is a complete set with all the necessary products for the lash lift and lamination, you don’t need to purchase any other essential items. Moreover, the high-quality products ensure that lashes remain visibly curled and lifted for up to 8 weeks. Thanks to the conditioner, the lashes also shine beautifully. The conditioner contains botanical oils that strengthen the lashes naturally.
I must admit that the easy application of the products is another advantage of Nanolash. The instructions are described step by step, so even a beginner can quickly figure out what to do. Additionally, the manufacturer’s website and social media feature videos showing exactly how to apply the products. Convenient, right?
And the price! The price is really affordable. Lash lift and lamination products can be very expensive, but the Nanolash kit is budget-friendly. Despite the affordable price, the products are top quality, and one kit is enough for 10 single applications. Just what I was looking for!
2. MIYA LASH Keratin Lash Lift Kit
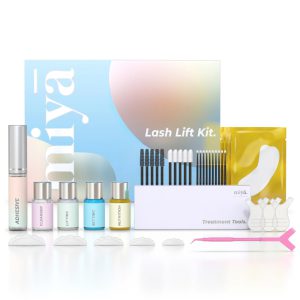
I also liked this kit, mainly because it has a rich product formulas and gentle ingredients, making it safe even for sensitive eyes.
The MIYA LASH kit also contains all the essential elements, such as:
- 5 ml each of neutralizer and activator,
- 7 ml glue,
- 5 ml cleaner,
- 5 ml nourishing serum,
- brushes,
- applicators,
- rods,
- eye pads.
The products in this kit are easy to apply, making it suitable even for beginners. The lash lamination effect is very good! After using this kit, my eyes were nicely and naturally highlighted.
Unfortunately, this kit doesn’t provide as long-lasting results as the Nanolash kit. In my case, the effects lasted about 6 weeks. It is also a bit more expensive than the previous kit.
3. Elleebana Lash Lift – starter lash lift kit
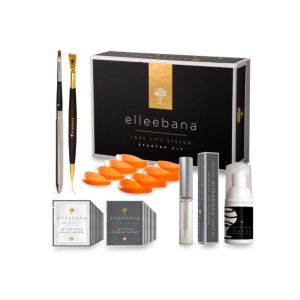
I chose this brand because their lash lift and lamination kit has good user reviews.
It’s one of the more expensive kits available, but it’s easily accessible in both physical stores and online.
The Elleebana kit also includes all the key products for at-home lash lift:
- sachets of activator and neutralizer,
- 5 ml brush-on glue,
- silicone rods,
- lash lift applicator,
- brush,
- 30 ml foam remover.
This kit allows you to perform the treatment at home without any additional tools. You’ll get beautiful and well-cared-for lashes right after use; the lashes are noticeably thicker and curled.
However, the effect was less long-lasting than with the previously mentioned kits. On my lashes, it lasted less than 6 weeks, but I was still satisfied.
What I didn’t like was that once opened, the sachets can’t be reused, so you need to use the products all at once. This means you might end up wasting some of the product during the at-home lash lamination. If the sachets were smaller, like with Nanolash, this wouldn’t be an issue.
4. RefectoCil Eyelash Lift
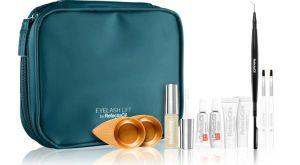
This kit is often chosen by beauty salons, so the products are very professional. What stands out about this kit is the speed of action, with visible results in just 13 minutes, lasting up to 6 weeks.
The kit includes:
- lifting tubes,
- lashperm tubes (3.5 ml each),
- neutralizer tubes (3.5 ml each),
- 4 ml glue,
- wooden pick,
- mini bowls,
- cosmetic brushes.
The lamination effect is not extremely dramatic, as it gives a very subtle and natural enhancement to the lashes. I think it’s a good choice for beginners, but for those looking for a more noticeable difference, I recommend the previous kits.
Its price is on the higher side, and for that quality, I wouldn’t invest in it again. The price is professional, but the effect feels more like a drugstore product…
5. Fleeky Lashlift Kit
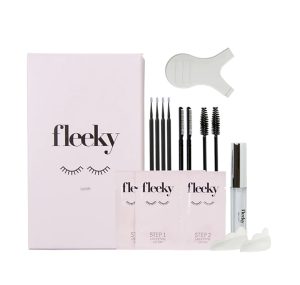
This kit caught my attention with its cute, girly packaging and relatively low price. It’s cheaper than the previous kits, so I recommend it especially for beginners.
The kit also includes all the necessary elements for at-home lash lamination:
- 2 g double-chamber Lash Lift sachets,
- silicone rods,
- 4 ml glue,
- lash brushes,
- applicator picks,
- combs.
So, if you want to try your hand at lasf lift and lamination this kit is an interesting solution. It gives a very subtle effect, so in case of failure, it fades quickly. It’s not as visible as with the previous kits, but for initial attempts, this could be an advantage.
What works against it is the lack of nourishing ingredients, which are very important during lash lamination and lift. Additionally, the effect lasts about 4 weeks, which isn’t exactly a “wow” factor. However, for first attempts, I think it’s enough.
All these kits cater to different needs; each of us knows best what we want and how much we’re willing to spend. Still, the above kits are an interesting alternative to traditional lash-enhancing methods.
Tips for At-Home Lash Lift and Lamination
While the lash lift and lamination are relatively easy to perform at home, follow these tips:
- Clean your lashes of makeup and impurities thoroughly before starting.
- Carefully read and follow the instructions included in the kit.
- Don’t exceed the recommended time for leaving the products on your lashes.
- If you have sensitive eyes, perform a patch test before full application.
- Avoid getting your lashes wet for 24-48 hours after the treatment.
- Regularly nourish your lashes with castor oil or a special conditioner.
With these simple steps, you’ll have beautiful and well-cared-for lashes!
Post-Lash Lift and Lamination Care
To enjoy the effect as long as possible, remember these rules:
- Avoid rubbing your eyes and harsh makeup removal.
- Use gentle, oil-free makeup removers.
- Brush your lashes regularly with a special brush.
- Apply lash conditioner 2-3 times a week.
- Avoid sauna and long baths for the first 48 hours after the application.
These tips will help your lashes maintain their long-lasting effect and nourishment.
When to Avoid Lash Lift and Lamination?
Although lash lamination and lash lift are relatively safe methods, there are situations when it’s better to avoid them:
- Eye or eyelid infections.
- Allergies to product ingredients.
- Eye sensitivity.
- Dry eye syndrome.
- Pregnancy and breastfeeding (always consult your doctor).
With the kits available on the market, you can perform the lash lift and lamination at home, but remember to do it wisely and according to the instructions.
In my opinion, Nanolash is the best choice for both beginners and professionals. It provides the longest-lasting lift and enhancement, while also beautifully nourishing the lashes. The other kits also work well for home use.
Have you used these kits? Be sure to share your opinion with me!

